Cub Cadet 60-inch Manuel de service
Naviguer en ligne ou télécharger Manuel de service pour Tondeuses à gazon Cub Cadet 60-inch. Cub Cadet 60-inch Service Manual Manuel d'utilisatio
- Page / 28
- Table des matières
- MARQUE LIVRES
- Hydrostatic Zero-Turn 1
- Commercial Riding Mower 1
- TABLE OF CONTENTS 2
- CAUTION: 3
- MODELS LISTED IN THIS MANUAL 3
- GENERAL SAFETY 4
- OPERATIONS 4
- SAFETY PRECAUTIONS 4
- B. Related to Fuel 5
- C. When Mowing 5
- SHIELD MISSING 6
- DO NOT OPERATE 6
- SPECIFICATIONS 7
- OPERATING INSTRUCTIONS 8
- B.Controls 9
- Steering Levers 10
- Deck Lift Handle 10
- Deck Links 11
- Deck Lift Spring inner nut 11
- WARNING: 12
- MAINTENANCE AND 14
- Height of Cut Clevis Pin 15
- Linch Pins 15
- Hydraulic Tank 16
- Hydraulic 17
- Unfasten hose and 17
- Hydro Release Valve 20
- Contaminants 21
- MAINTENANCE SCHEDULE 22
- OIL CHART 23
- LUBRICATION CHART 23
- Lap Bar Stop Bolt 24
- E. Lap Bar Adjustment 25
- F. Deck leveling Procedure 26
- WIRING DIAGRAM 27
- Cub Cadet 28
- P.O. Box 368023 28
- Cleveland, Ohio 44136 28
Résumé du contenu
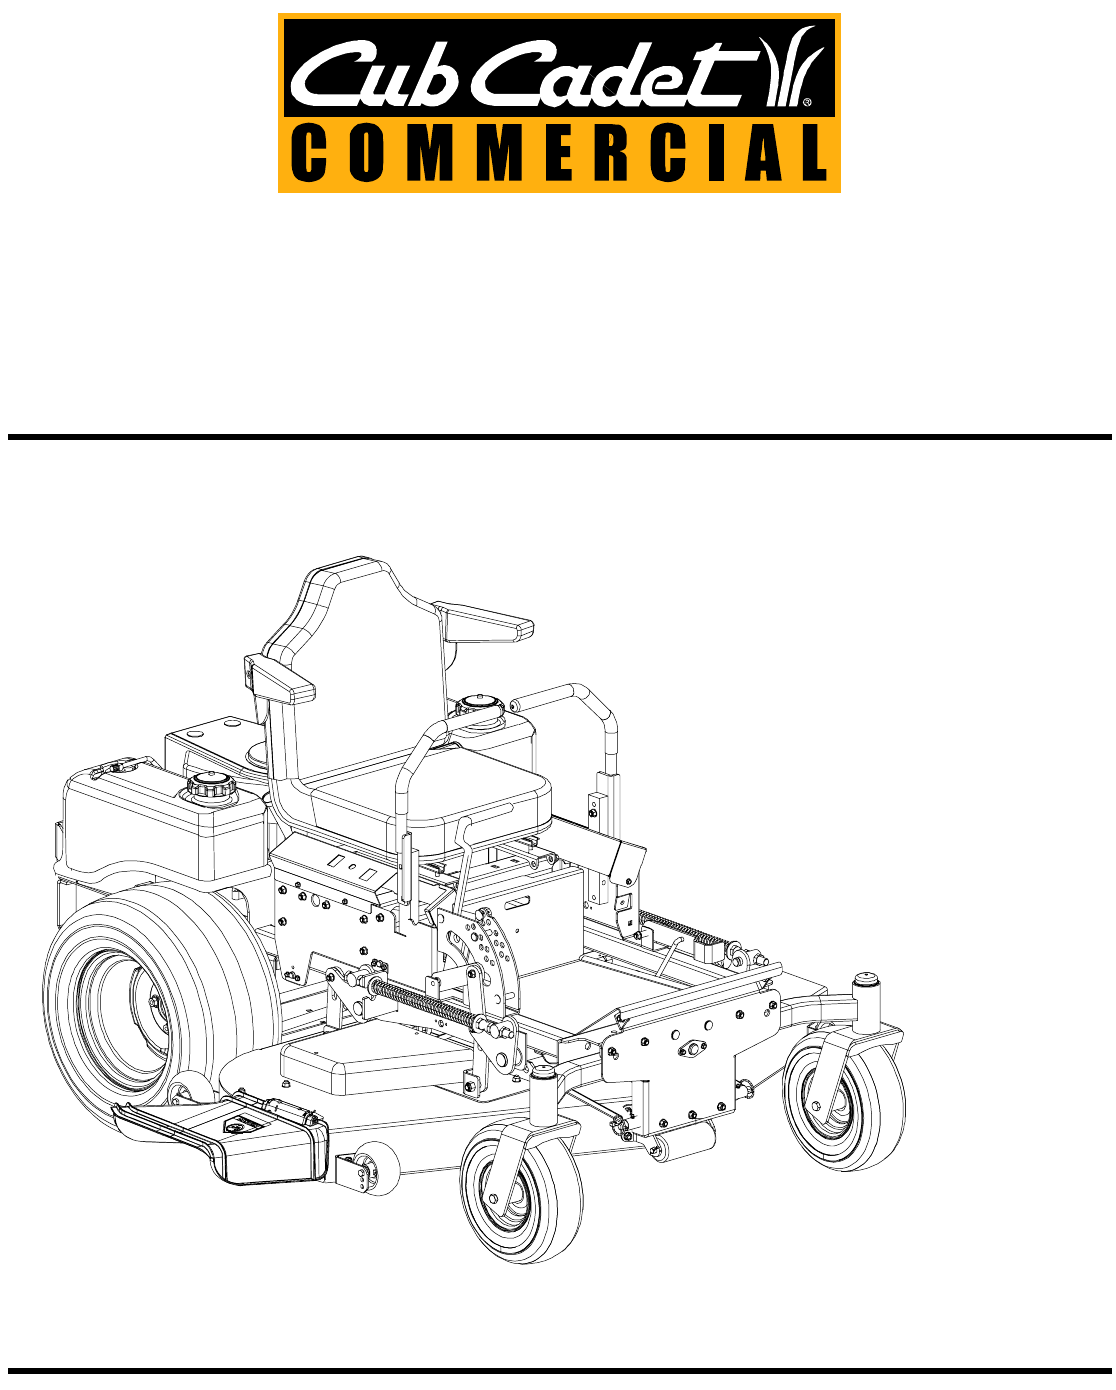
Hydrostatic Zero-TurnCommercial Riding MowerProfessional Turf EquipmentOPERATOR’S AND SERVICE MANUAL60” & 72” Fabricated DeckDigital Fuel Injectio
104.Electric Blade Clutch Switch: (See Figure 1.) Located on the right side of the mower beside the ignition switch. This is an “on/off” push pull swi
11C.Initial Adjustments1. Check the fluid levels and tires:Note: These checks should be made daily, before starting the engine.a.Fuel: Using a good gr
12turn the top bolt clockwise or counter clockwise a few turns. Adjust both front and rear Deck links as necessary. Retighten nuts.f. Raise the mowing
13panel). This must be increased to full speed (3525-3675 rpm) after becoming familiar with the machine.2. Release the park brake.3. Move both lap bar
14g. Turn the ignition key in a clockwise direc-tion to the “Start” position until the engine starts.Note: Do not hold the key in the “Start” position
15d. Detach the mower drive belt.e. Remove six linchpins (See Fig. 6) (4) from the deck and (2) from the front of the mower. Remove the linchpins on t
16e. Pull the tensioner pulley away from the belt and remove the PTO belt then remove the blade drive belt.f. Reverse the process to install the belt.
17caps and drain oil from both left and right pumps. Replace and retighten nuts.j. Coat new filter seal with oil before installa-tion. Install new hyd
186.Fuses: There are two fuses located in the wir-ing between the ignition and start switch and other electrical components. This is a stan-dard plug-
19one of the steering levers up to the operat-ing position. Release the operator’s seat and the engine should stop. If the engine does not stop, the s
2TABLE OF CONTENTSForeword. . . . . . . . . . . . . . . . . . . . . . . . . . . . . . . . . . . . . . . . . . . . . . . . . . . . . . . . . . . . . .
20c. Locate jam nuts. (Reference control assembly in parts list).d. Loosen jam nuts on both ends of rod con-nectors. See Control Assembly in the Illus
21time the engine is running. Because of extremely close tolerances, wear is an impor-tant factor in their life. Contaminants in the hydraulic oil and
22Replace the fuel line on the carburetor. Start the engine and allow it to run out of fuel. This will prevent gum and varnish deposits from forming.
23.OIL CHARTApply a few drops of SAE 10W-30 engine oil or use a spray lubricant. Apply the oil to both sides of pivot points. Wipe off any excess. Sta
24Performance AdjustmentsA. High Speed Tracking AdjustmentIf mower tracks to one side with both lap bars in fully forward position:1. Check air pressu
25C. Deck Corner Ball Wheel Roller Settings1. Matching the set heights of the ball rollers on the four corners of the mower deck to the desired cut he
26F. Deck leveling Procedure1. Park the mower on a flat paved surface, engage the parking brake, shut off the engine, remove the key from the ignition
27WIRING DIAGRAMGD: 02000587
MANUFACTURER’S LIMITED WARRANTY - TURF EQUIPMENTThis warranty is specific to the product manual to which it is attached.For a complete list of product
3FORWARDThe Tank Hydrostatic Zero-Turn Commercial Riding Mower provides superb maneuverability,mid-mount cutting capability for professional landscape
4GENERAL SAFETYOPERATIONSA. DANGER1. Do not operate machine in confined areas where exhaust gases can accumulate.2. Do not operate machine without mow
5ture. Keep sparks and flames away at all times.11. When looking for oil leaks, never run your hand over hydraulic hoses, lines or fittings. Never tig
6SAFETY DECALS AND LABELSWARNINGSHIELD MISSINGDO NOT OPERATE! WARNINGSerious bodily injury may result from failure to follow safeoperating proc
7SPECIFICATIONSEngine: 29HP, Digital Fuel Injection, Liquid-Cooled, OHV, KawasakiType: Horizontal Crankshaft, V-TwinAir Cleaner: Dual Element, Canist
8OPERATING INSTRUCTIONSA.General1. When Mowing:a. Keep adults, children, and pets away from the area to be mowed.b. When operating this mower, in the
9b. Avoid turning downhill if possible, if not use extra care and go slowly.c. Avoid turning when going downhill, traction is at a minimum going downh
Produits connexes et manuels pour Tondeuses à gazon Cub Cadet 60-inch
 (1 pages)
 (24 pages)
 (72 pages)
© 2020, manymanuals.fr. Tous droits réservés | 0.836 s |
 Manymanuals.com
 Manymanuals.de
 Manymanuals.fr
 Manymanuals.it
 Manymanuals.pl
 Manymanuals.cz
 Manymanuals.es
 Manymanuals-pt.com
Commentaires sur ces manuels